Note: For assembling the barbecue, it is recommended to have two people and a bolt wrench.
1. Preparing the base:
- Turn the base of the barbecue upside down to make it easier to install the 4 wheels.
- Align the caster mounting holes with the designated spots on the base.
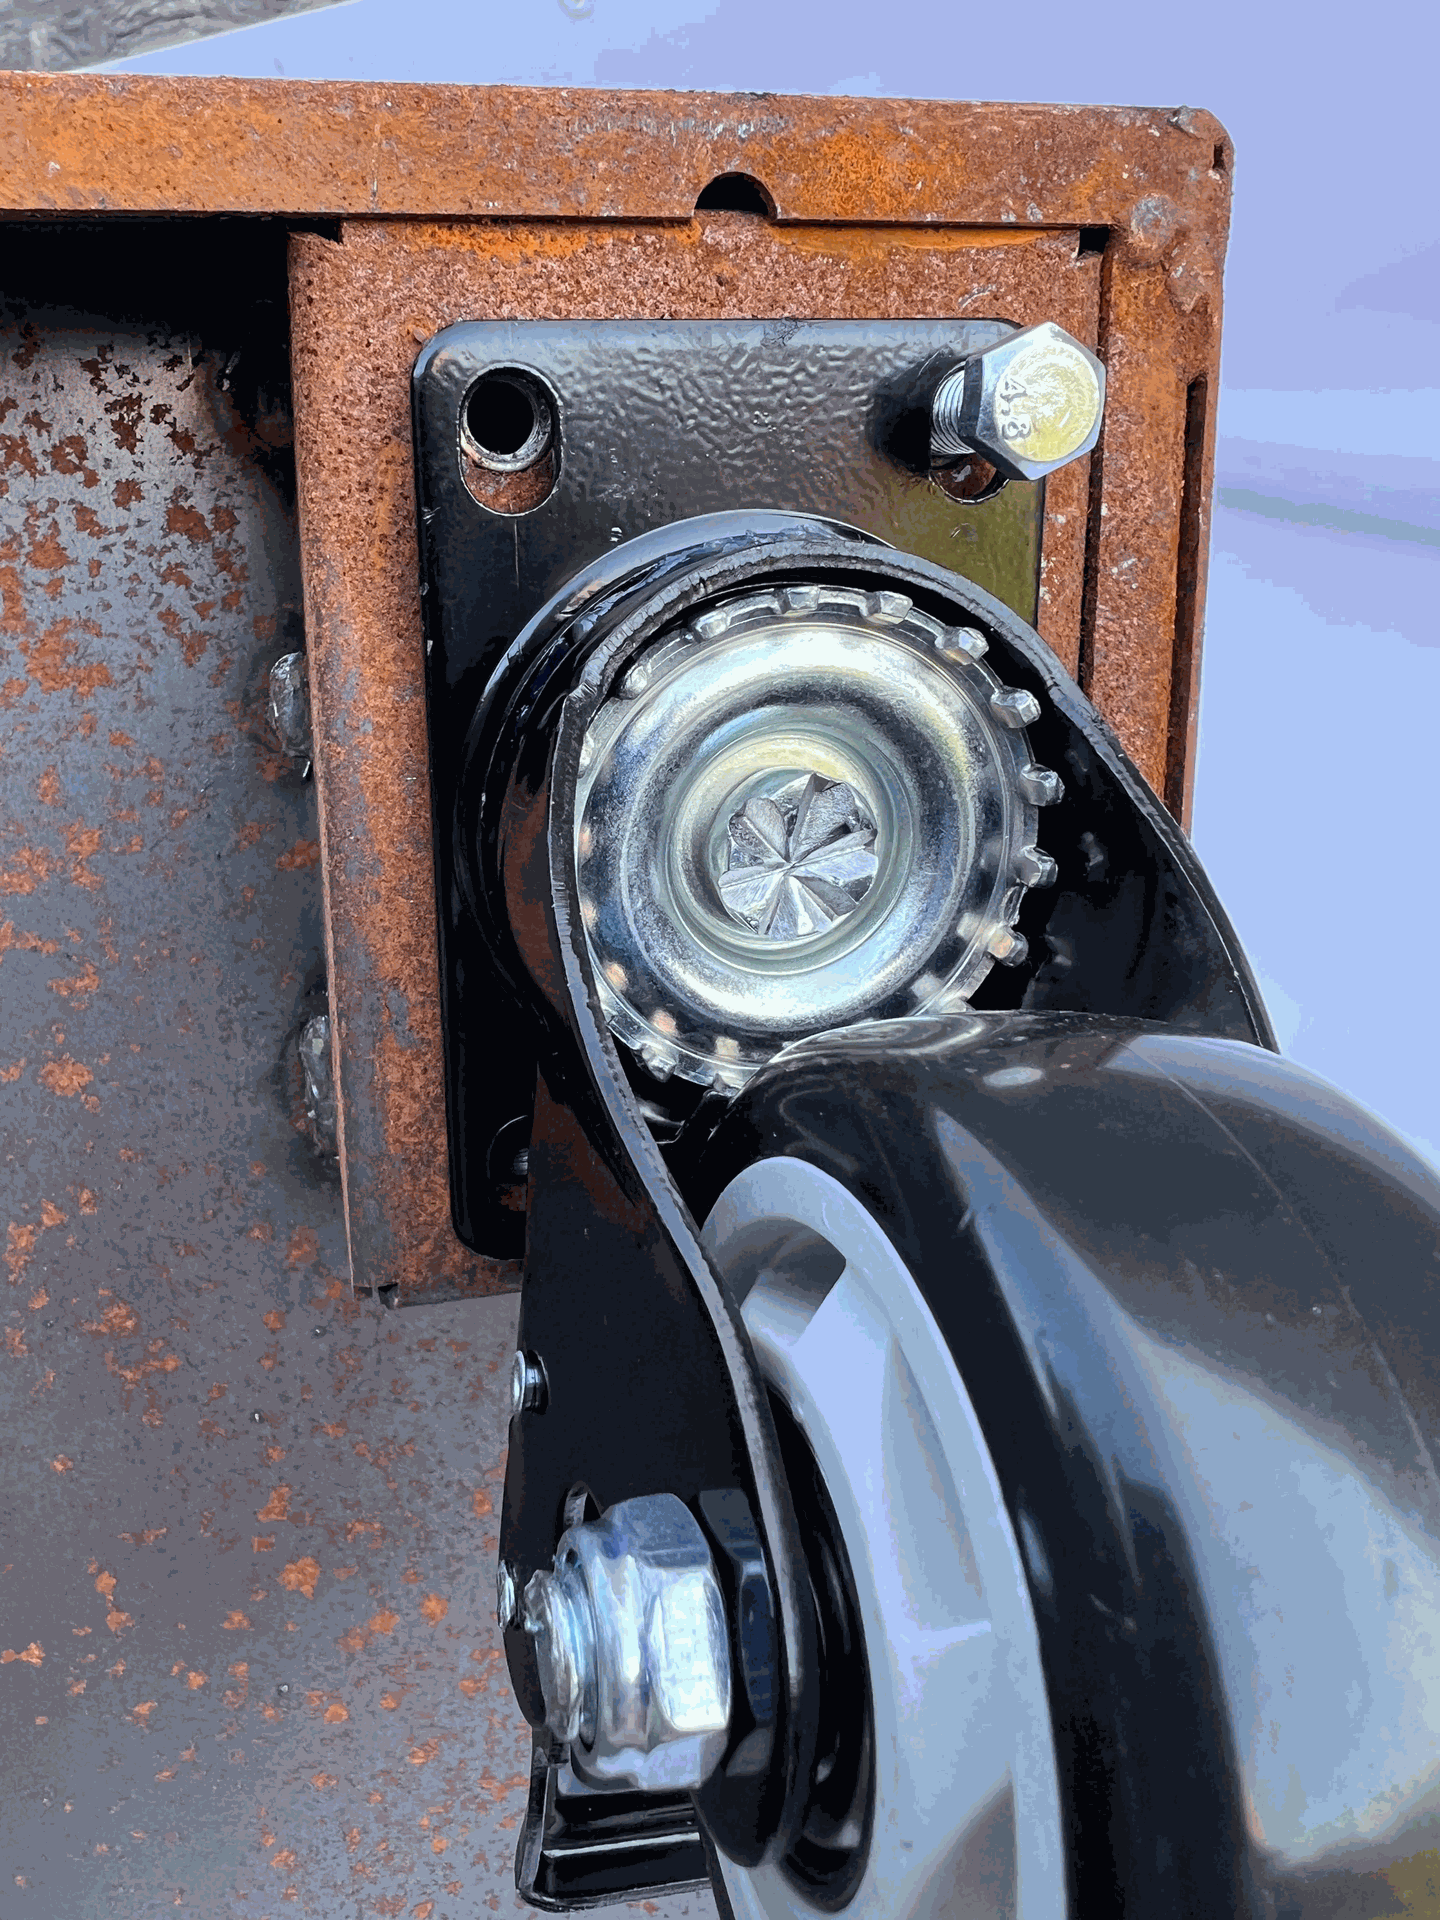
2. Installing the wheels:
- Insert the 4 provided screws into each wheel mounting point.
- Tighten each screw firmly using the bolt wrench to securely attach the wheels.
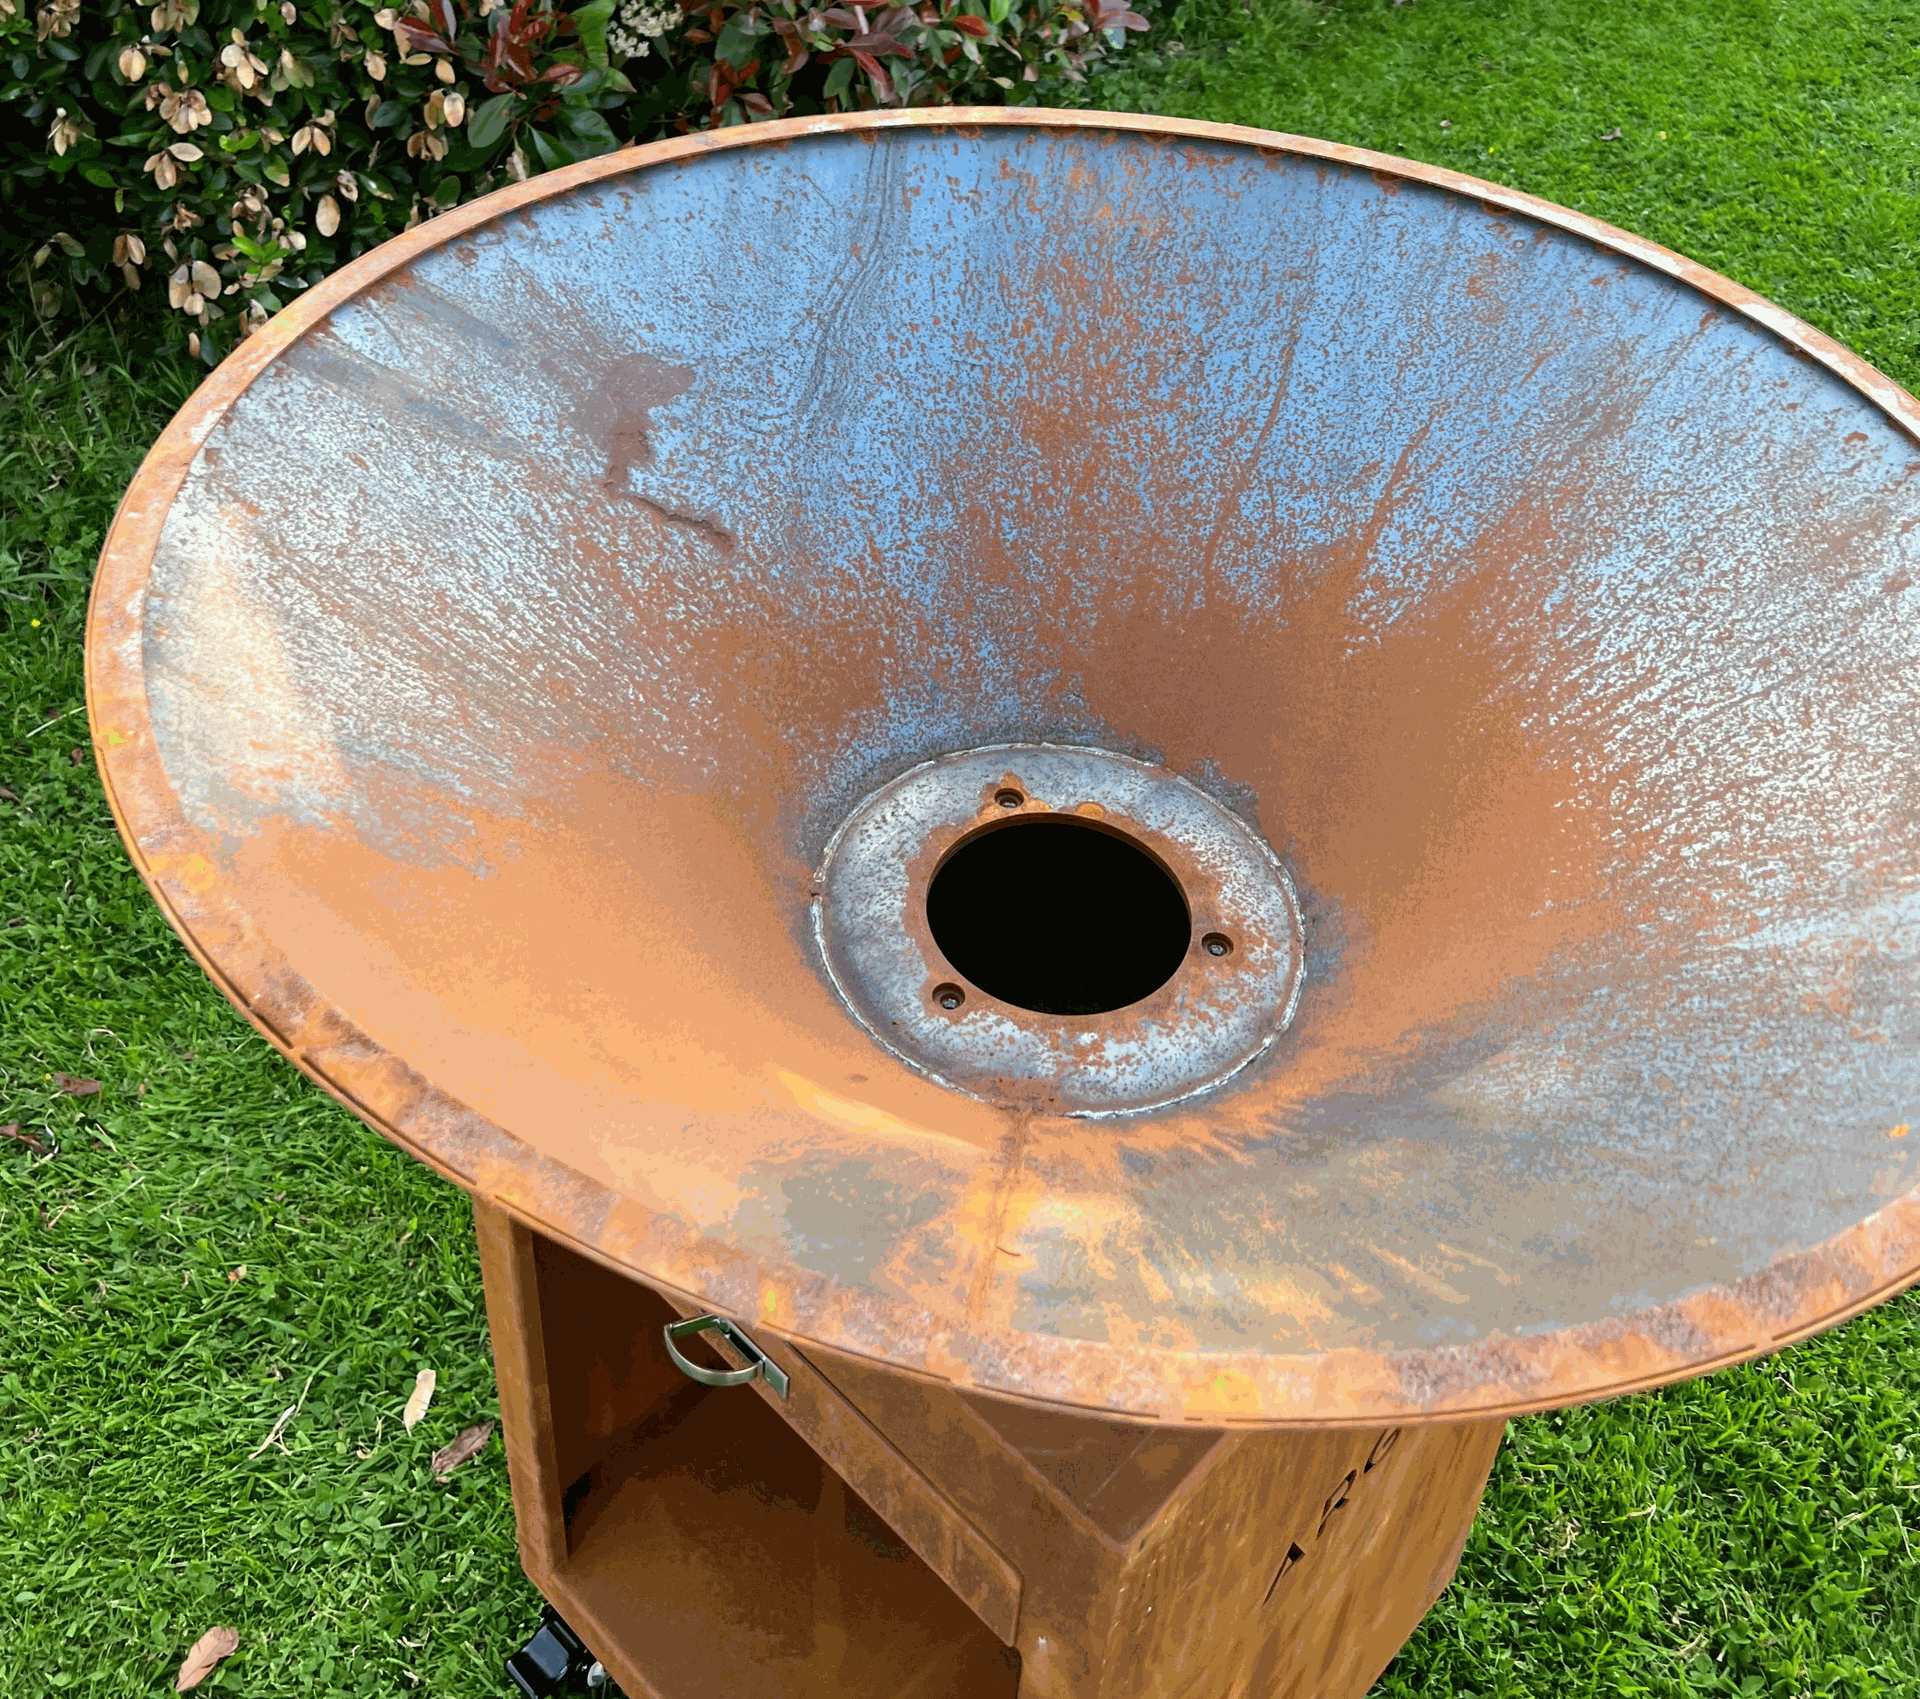
3. Assembling the cone:
- Once the wheels are installed, place the barbecue upright on its wheels and position the cone on the base.
- Align the cone’s mounting holes with those on the base for precise assembly.
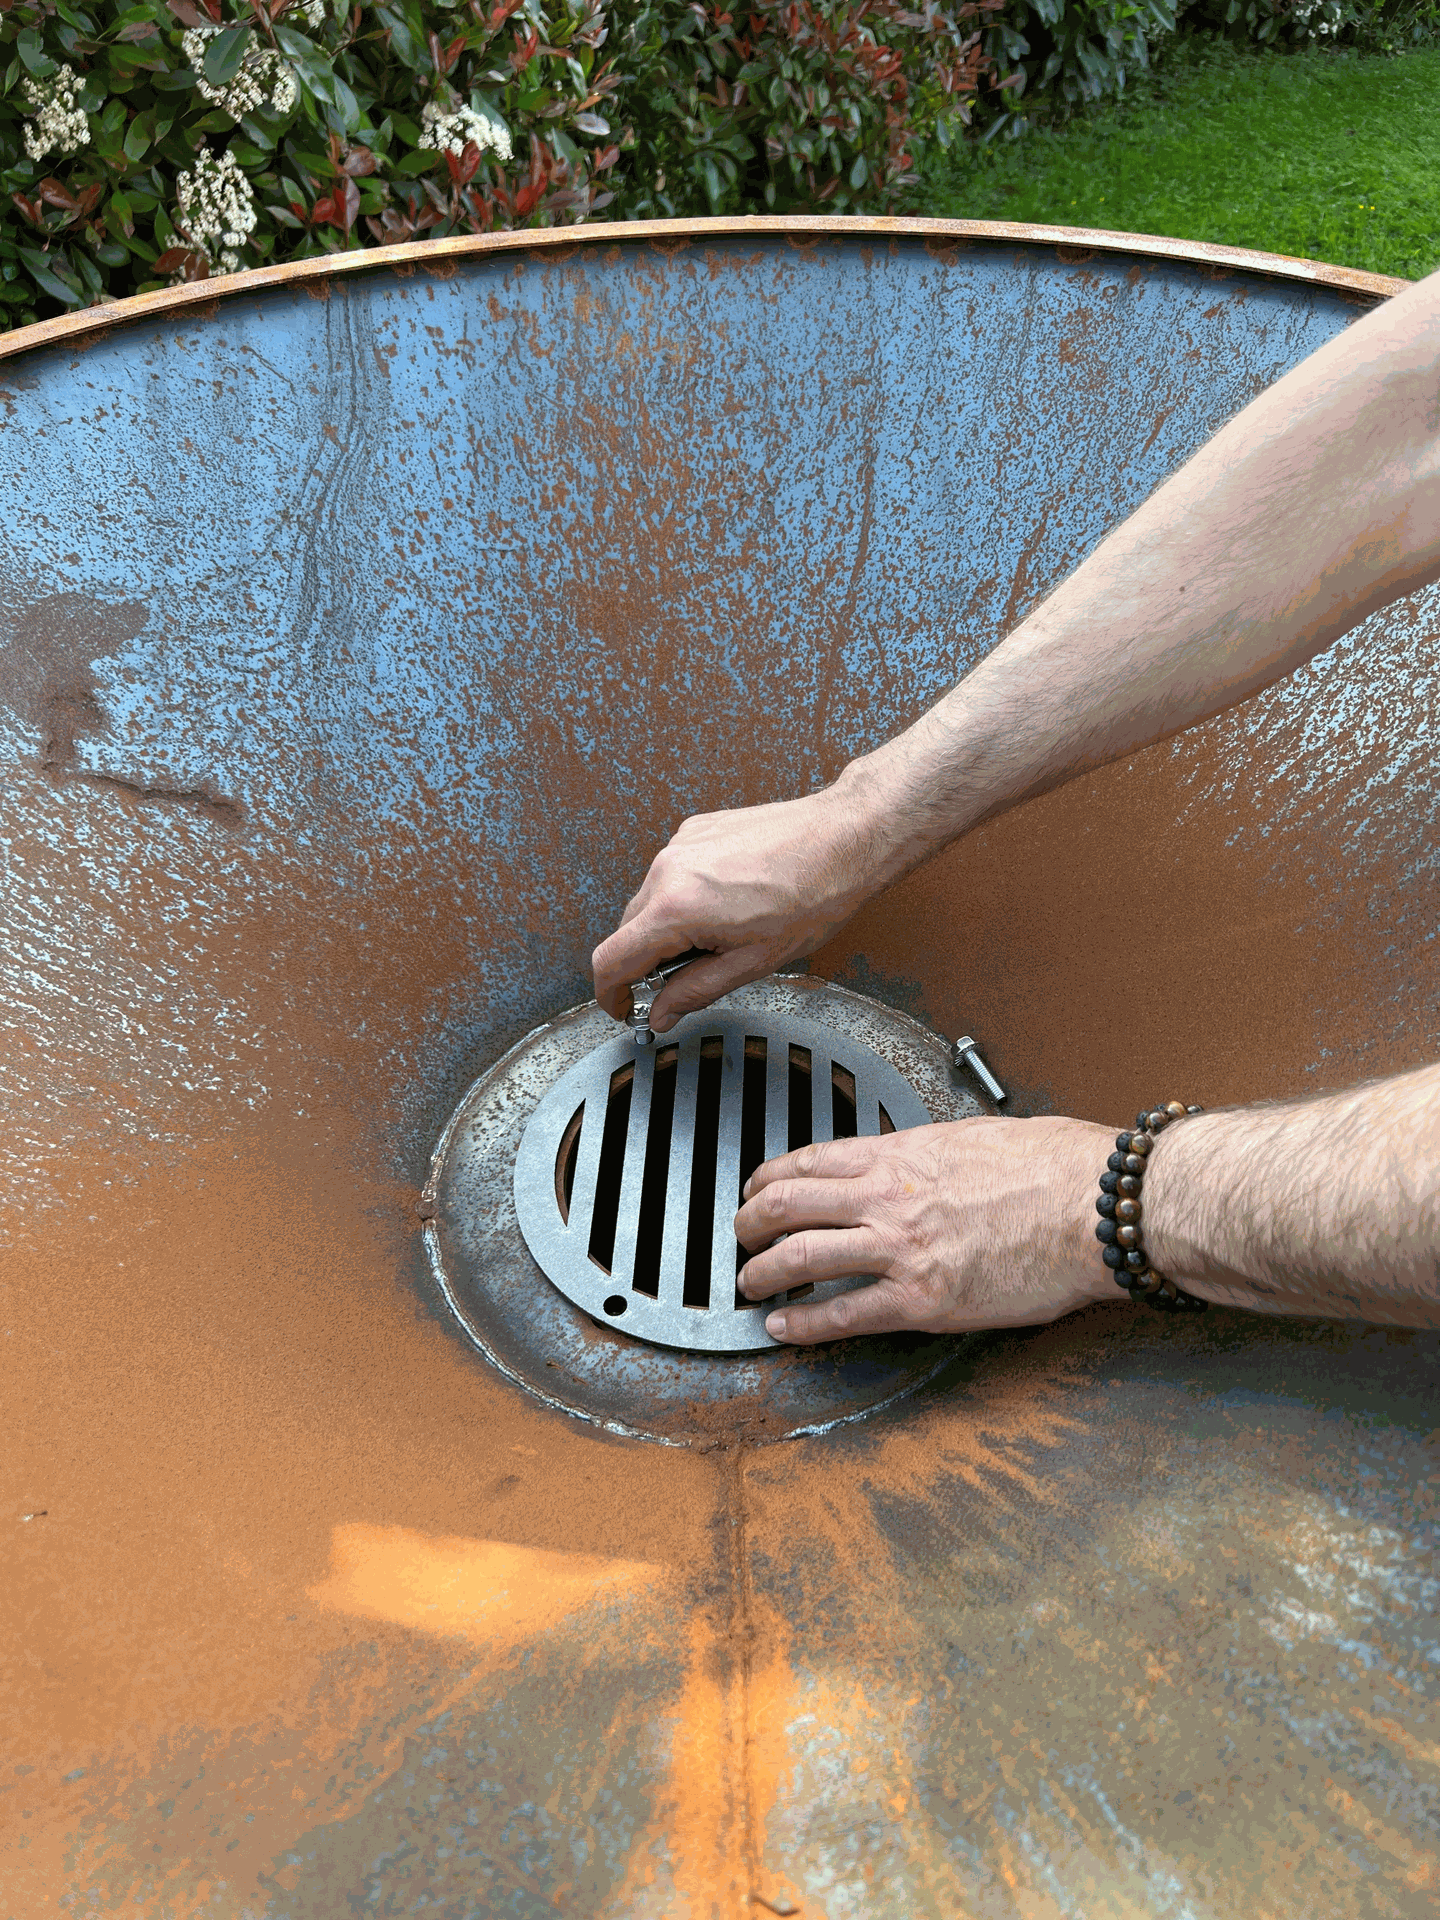
4. Installing the small grill:
- Inside the cone, position the small provided grill by aligning its holes with those of the cone and the base.
- Use the 3 provided screws to securely fasten the grill, and make sure it is properly in place by tightening the screws.
5. Installing the plancha:
- Place the plancha on top of the cone. Due to the weight of the plancha, it is recommended to have assistance for this step.
- Carefully position the plancha on the cone, making sure it is properly aligned and balanced.
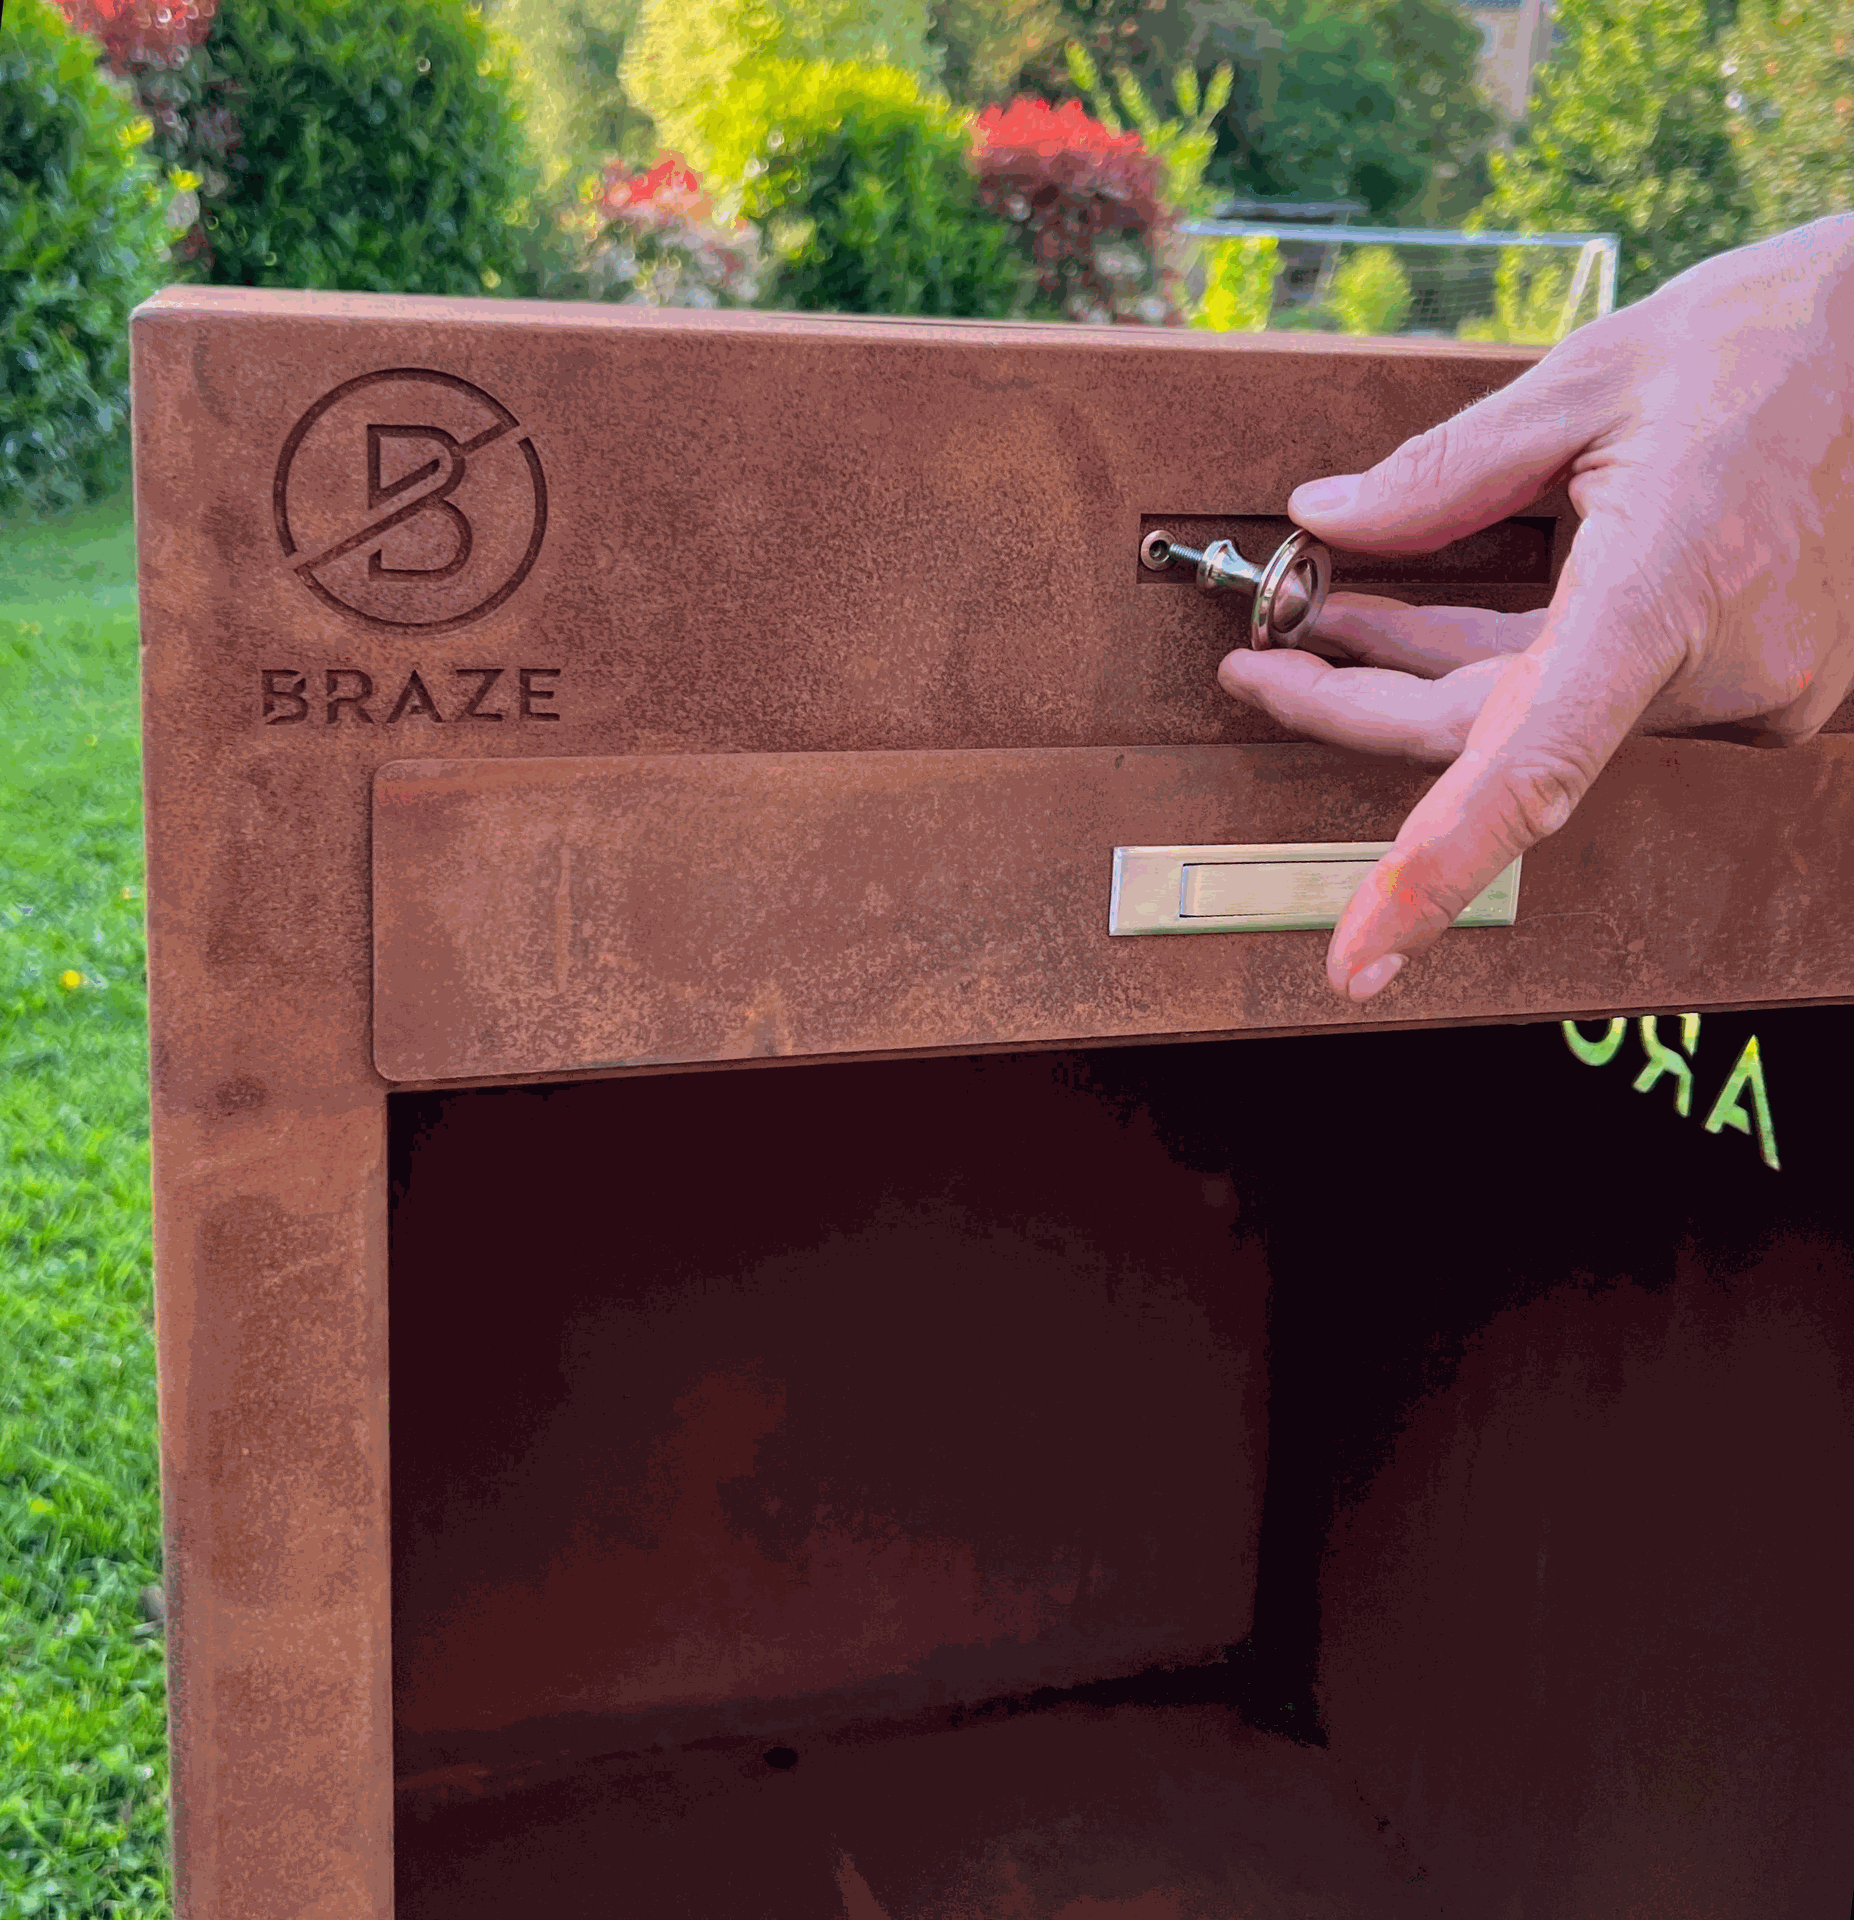
6. Attaching the air intake handle:
- Attach the air intake handle to the designated metal part.
- If this part is not visible, open the ash collection tray and slide it to the left to access the handle mounting point.
- Once the metal part is visible, secure the handle in place.
7. Assembling the lid handle:
- Locate the screw already placed inside the corten steel lid handle.
- Unscrew this screw, then position the handle on the barbecue lid.
- Tighten the screw firmly to secure the handle in place.
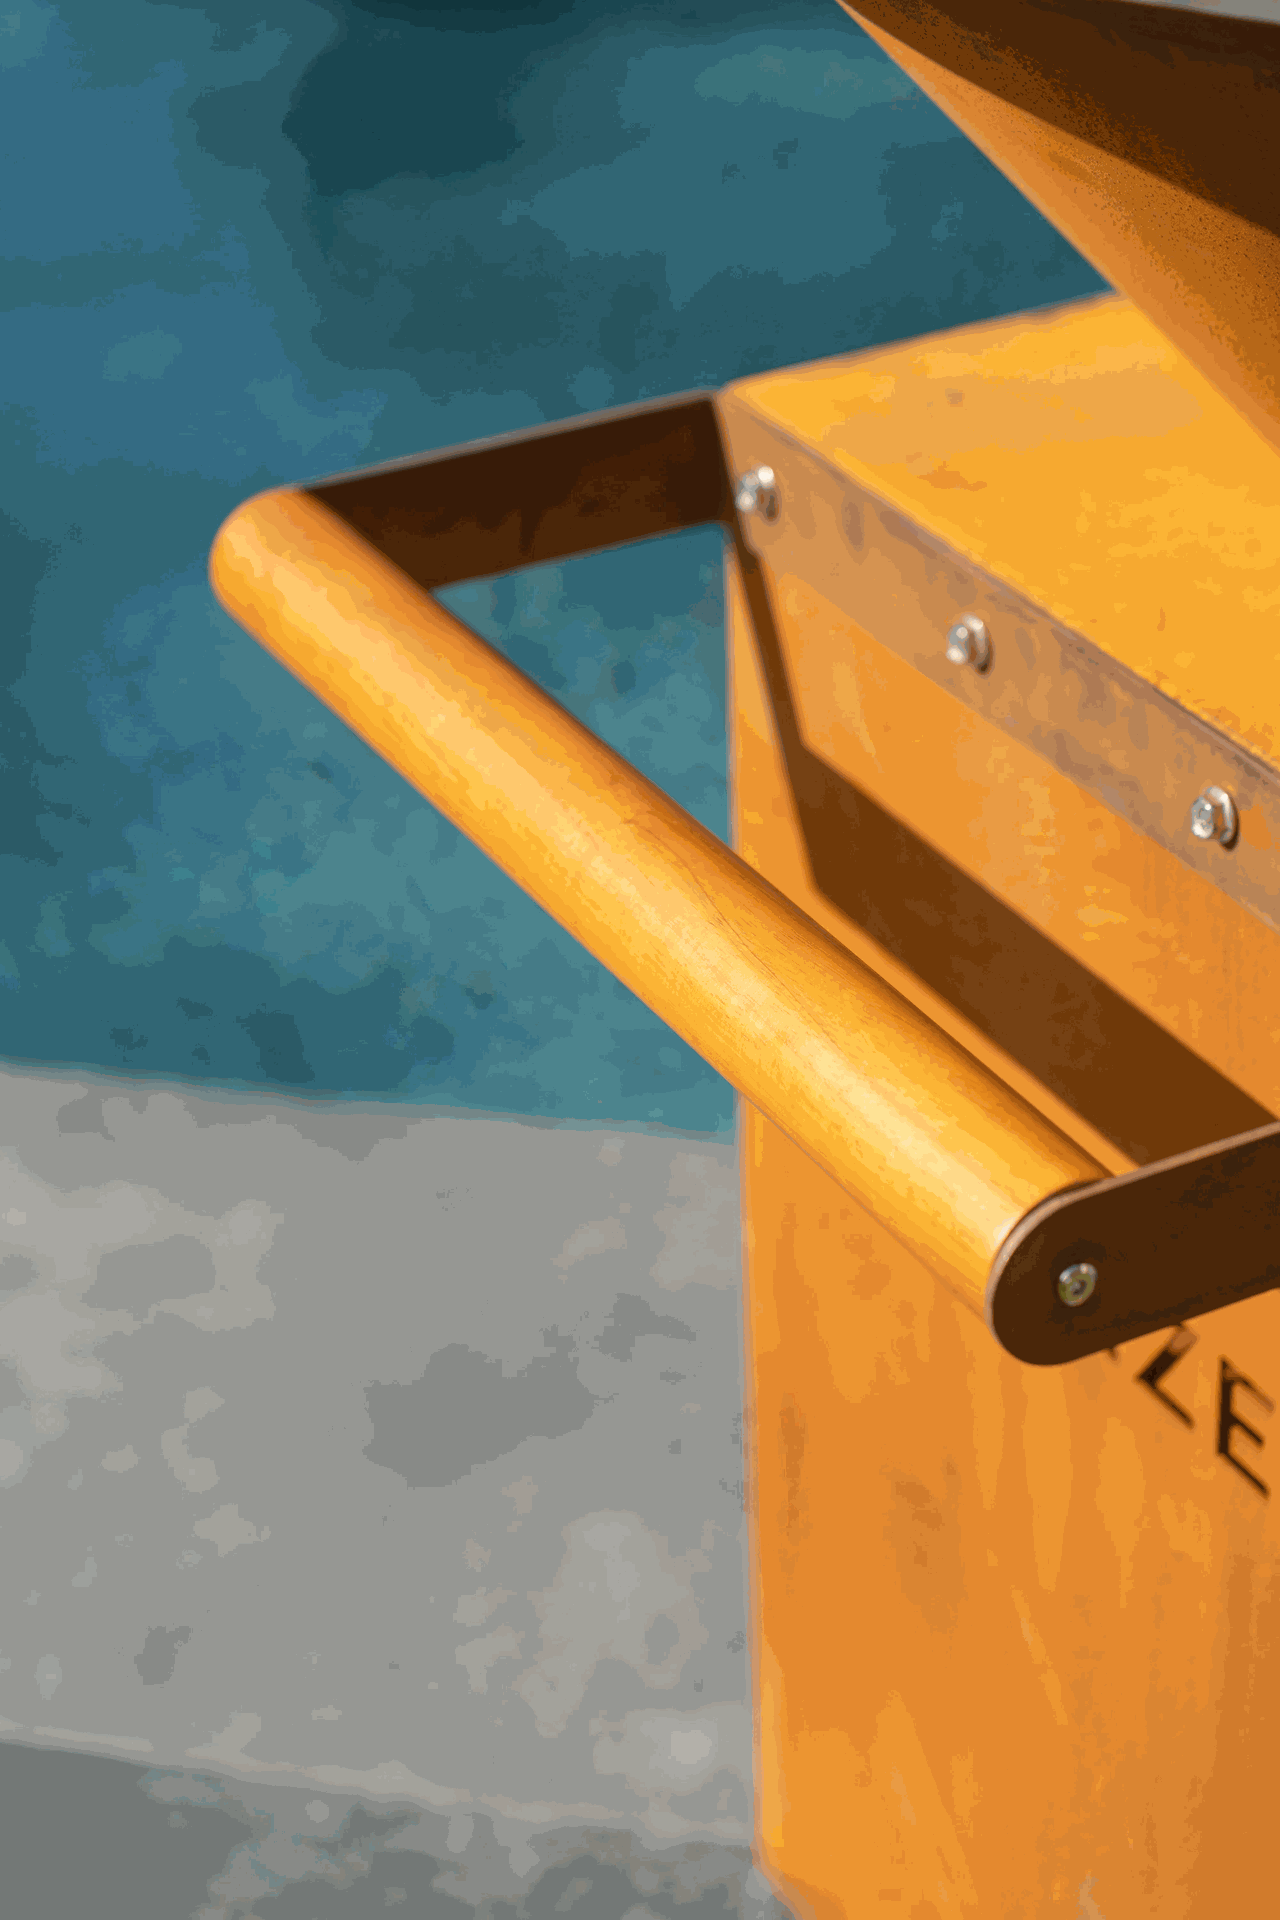
8. Assembling the side handle:
- Attaching the handle:
To install the wooden side handle, start by locating the three provided screws. These screws will be used to attach the wooden handle to the side of the barbecue, providing both practical use and aesthetic appeal. Carefully align the handle with the designated mounting points on the metal structure of the barbecue, then insert and tighten the screws securely to ensure a solid and stable attachment. - Attaching the wooden support:
Once the handle is installed, you can attach the wooden support to the metal base. This support comes with small pre-installed screws in the wood, allowing for easy attachment to the metal structure. Make sure the wooden support is properly aligned and securely screwed in place to ensure optimal and long-lasting use.
- Attaching the handle:
Your BRAZE barbecue is now ready to use for preparing your best outdoor meals. Make the most of your culinary experience with BRAZE.
